A Canning Tutorial, for Humans or Zombies

This post originally appeared on the Zombie Preparedness Initiative website.

As a follow-up to my previous post, here are some more detailed instructions on water-bath canning.

First off, most of these steps are generic for any type of canning, but there may be slight variations depending on what you are canning. Always follow the specific instructions over the general guidelines below. If, in fact, the zombie apocalypse has already taken place and you are a zombie looking for directions on how to can brains, no recipes exist as far as I know, and you’re going to have to wing it.

Overall, the general idea is to sterilize the food and containers and then seal them, preventing contamination and allowing the food to be “shelf stable” without requiring refrigeration. We’re talking about bacterial contamination here; it is unlikely that a hot water bath would sufficiently destroy any lurking zombie virus pathogens.

Equipment

Propper jars, lids, and rings are necessary. Other equipment, such as a canning pot, funnel, and jar-lifter are not strictly necessary, but are cheap and easy enough to come by, that they are worth the time and effort they will save you. Rings and jars can be re-used, but lids must be new every time to ensure a good seal. Jars should be checked each time for chips or imperfections in the rim, which will prevent the jar from sealing.

Any pot will do for the canning, but it must be able to cover the jars with at least 1 inch of water. The bigger the pot, the more volume you can process at a time. Processing the jars can be the longest part, so processing more at a time can greatly reduce your overall time. Our standard canner can fit 7 quarts, and comes with a wire rack for holding and lowering the jars into the water. For items that don’t need such big jars, such as jams in half-pint jars, we just use a regular, large pot.

In the case of canning under threat of zombie attack, you will also need an assistant wielding the standard zombie fighting equipment, such as shotguns, chainsaws and kick-ass fighting music.

Steps

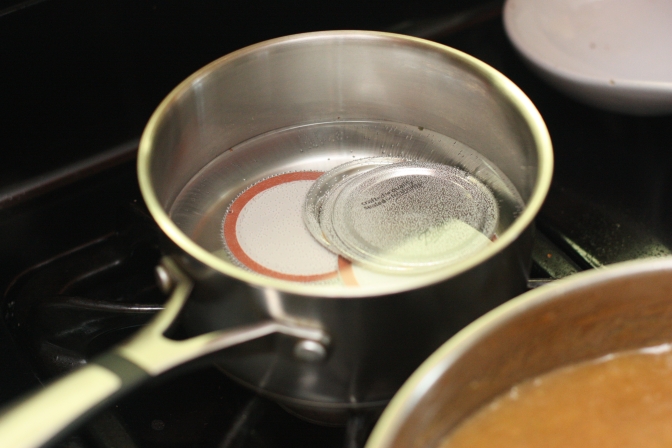
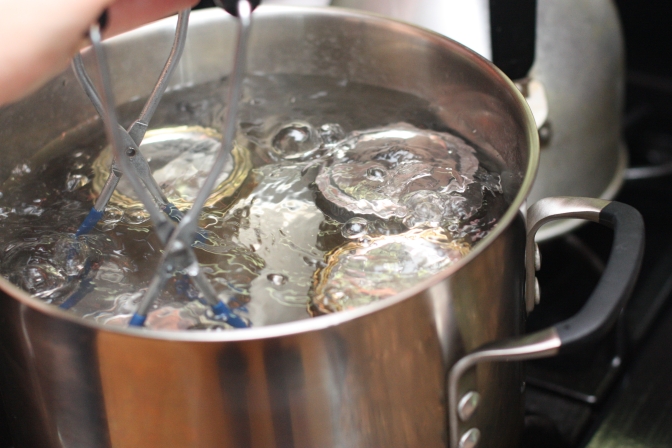
  1. Fill the canning pot with water and bring it to a boil. Sterilize the jars and rings in the canning pot. Heat the lids on low in a separate, smaller pot of hot water. This will help soften the plastic part of the lid, for better sealing.2013_05_19_9999 (2)
  2. Prepare the item to be canned as per the recipe (i.e. make the jam, prepare the brine for the brains, pickles, etc.). Note that some items may need to be prepared ahead of time, so it is very important to read the recipe first! In the case of brains, some of us have begun pickling ours years in advance. You’re welcome.
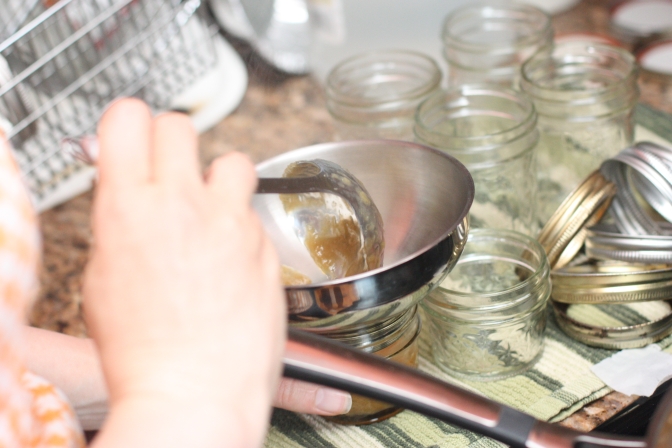
  3. Remove the sterilized jars from the hot water bath and place on a towel. Fill the jars with the item to be canned. The recipe will specify how much empty space to leave at the top of the jar, called “headspace”. This is important! Headspace varies depending on what is being canned. Too much headspace and the jar will not seal; too little headspace and the item may expand out of the jar, also causing the jar not to seal. If you are canning brains, “headspace” should be considered a pun, but you’ve probably lost the ability to appreciate humor.
    2013_05_19_9999_2 (2)
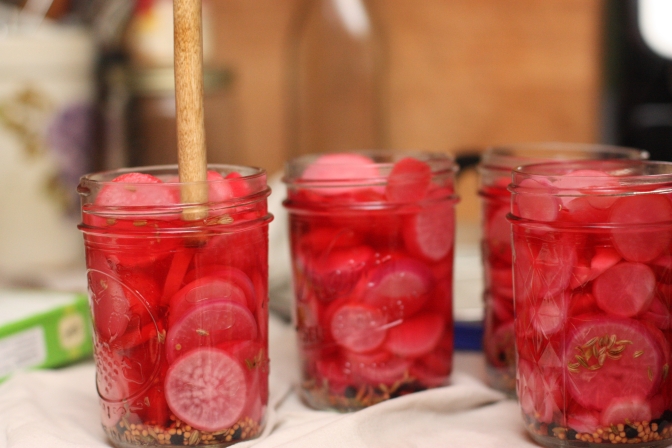
  4. If applicable, use a tool or any other flat object such as a butter knife or handy rib bone to release the air bubbles. The recipe will specify whether this step is necessary or not. It is not necessary with thick liquids like jam, but it is usually necessary for things that can easily trap air, like brains or pickles.
    2013_05_20_9999_2
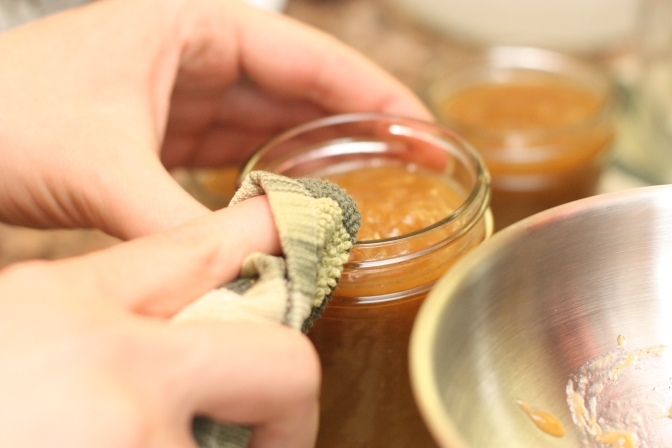
  5. Wipe the rim of the jar with a towel. This seems trivial, but it is important! Any chips or drips will prevent the jar from sealing. If you are a zombie, try to keep your drooling and dripping away from the rim of the jar.
    2013_05_19_9999_5 (2)
  6. Get the lids out of the hot water and place them on the jars. We have a tool for this that is basically a magnet on a stick, but any kind of tongs will do to pick up the lids. Zombies may simply reach into the boiling water directly.
  7. Finger-tighten the rings over the lids. Do not tighten the rings as tight as you can. The goal is to allow air to escape when the jars are processing, without allowing water to enter the jars.
  8. Add the jars to the boiling water bath, making sure they are covered by at least 1 inch of water. If you are not a member of the undead, it is very useful to have a jar lifter for this part.
    2013_05_19_9999_7
  9. “Process” the jars by letting them sit in the hot water bath for as long as the recipe calls for. Processing time varies widely by recipe, and can be anywhere from 5 minutes to 35 minutes. Processing serves two purposes: the first is to heat everything enough to kill any bacteria, the second is to allow the contents to expand and force air out of the jar. This is mostly hands-off time, so non-zombie canners may lend a hand to defensive forces attempting to fend off undead hordes attempting to breach your canning location.
  10. Turn off the heat and let the pot sit for a few minutes with the lid off. Remove the jars from the hot water bath and place them on a towel to cool. As the contents of the jar cool, they contract, pulling the lid down firmly and making a seal. Sometimes a jar will seal as soon as it is removed from the bath, but it can take up to an hour. When a jar seals, it makes a surprisingly satisfying “snap!”
  11. In the event that your ears have decomposed, do not worry! After an hour or so, try pressing down the center of the lid. If it depresses, the jar did not seal. At that point, you can check the rim for imperfections, re-wipe the rim, and then try to re-process the jar. This often works to seal jars that didn’t seal the first time, so it is definitely worth a try. Any jars that won’t seal should be refrigerated immediately. This is not always a bad thing, because you probably want to try a jar right away anyway.
  12. Allow the jars to sit until they are fully cool. The recommendation is usually something like 12 hours, but in my experience a couple of hours is sufficient. Some items, like pickles, may need to sit for a certain length of time before they are ready. This information will be specified in the recipe. Zombies, try to remember to open the jar before eating the contents.

That’s it! Before you know it, your pantry will be stocked with long-lasting fruits and vegetables (or brains and other assorted body parts) that require virtually no upkeep, and will keep the occupants of any post-apocalypse bunker well fed and happy, human or otherwise.

Zombie Preparedness Hobby: Canning

This post originally appeared on the Zombie Preparedness Initiative website.

We all need hobbies to take our minds off of the daily grind, and relax. However, there’s no reason these hobbies can’t also help to hone skills needed in the case of the inevitable.

At its heart, canning is about sterilization and food preservation, two things very near and dear to our hearts. The general idea is to heat the food and container to a temperature that will kill any bacteria, and then vacuum seal it to prevent contamination. Canned foods can last up to five years (or even longer in some circumstances), require no refrigeration or electricity, and are self contained in a package suitable for travel.

Low-acid foods, such as meat or vegetables, must be canned in a pressure canner. (Note: a pressure canner is not exactly the same as a pressure cooker!) High-acid foods, such as fruits or pickled vegetables, can be canned in a simple hot water bath. Recipes can be more or less complicated, but this can be as simple as filling a sterilized jar with fruit and sugar water and dropping it in hot water for 15 – 20 minutes.

The equipment for hot water bath canning is easy enough to come by. The hot water bath itself is easily improvised with a large pot and a fire. However, the more difficult part to obtain are mason jars, lids, and rings. Jars and rings are re-useable, but lids are not.

In my experience, small, local hardware stores are surprisingly one of the best places to get canning supplies. Since you will undoubtedly need to raid a hardware store at some point, be sure to stock up on lids. This should be especially easy, since the foolish or short-sighted will probably not be thinking of this long-term item. Jars can be obtained at the same place, but vast, undiscovered caches of jars are living in the basements of old ladies everywhere. Jars can be reused, so you can also start with a few and grow your collection over time. Just be sure that there are no chips or cracks around the edges of the jars, since these will prevent the jar from sealing.

There is a little bit of an art to canning, so it is smart to invest some time now, while you have the luxury. In the long term, you have a relatively sustainable way to preserve the vegetables from your rooftop garden (you are planning on having a rooftop garden, right?) to help sustain you for years to come. And the best part? This is a useful hobby to know in a non-post apocalyptic world: nothing beats homemade jam!

For reference books, I suggest the old standby, the Ball Blue Book Guide to Preserving. However, if you’re looking for something a little more modern, I’d recommend Food in Jars or Canning for a New Generation. For an online reference on canning (as well as a literal map on where to head for food when the collapse comes), check out pickyourown.org.

Shane is a programmer and writer who blogs at shanehalbach.com about zombies, bacon, pirates, and his children (not necessarily in that order).

The Zombie Preparedness Initiative

Of course, we all know how valuable bacon would be in the case of a zombie apocalypse (the correct answer being “more valuable than gold”). This very topic was discussed at Baconfest in regards to the Tactical Bacon. Commenter Victor Tookes was quick to point out this post on How to Make Bacon Post Apocalypse.

This article is great, with some fantastic quotes:

There is no reason that the walking dead should stop humanity from enjoying it’s crowning culinary achievement.

and

Pigs are fantastic, magical animals, they turn vegetables into bacon.

Tell me that is not just *dying* to be put on a tee-shirt.

However, the informative bacon posts are just the beginning! It is well worth looking around the rest of the Zombie Preparedness Initiative’s website!

Hours and hours of things to read there. Important, life saving things. Keep in mind, this is the only zombie organization specifically inspired by Shaun of the Dead. And if that doesn’t make them serious enough, they have an .org extension on their webpage. They are an organization people!

An important organization with an important mission. I want all of you to study up. We’ll each have our roles to play, and we don’t have room on the team for any slackers.

Now here’s a company who knows how to market!

Most makers of pole barns probably target farmers, or other country types. Only a few go out of their way to cater to special niche markets. CB Structure is one of those few, with this article: the comprehensive plan for surviving the zombie apocalypse from your pole barn.

The article covers all the most important design decisions: what type of hinges can best withstand the cold strong hands of the undead? Which type of siding makes it easier to hose off the guts? How big should my barn doors be to admit my modified jeep/zombie destruction mobile? What kind of square footage should I be looking at to store all the necessary food-stuffs?

In fact, the article even goes so far as to help you plan your pole bar for a time when the zombie horde has been defeated, and life can go back to normal. What better way than a zombie survival museum?

It’s called thinking ahead people!

Look, I have no idea if their pole barns are any better than anybody else’s pole barns. But at least I know that they are serious businessmen with serious consideration of serious issues. Would somebody please order one of these pole barns so that I know where to go in case of emergency??

Technology: our advantage over the undead

They might have unflagging strength and endurance as well as overwhelming numbers, but what they do not have is reliable Internet access.

Jump on the zombie survival map at Map of the Dead, and get your location in Google maps highlighted with nearby zombie survival necessities, such as gun stores, outdoor stores, grocery stores, hardware stores,  hospitals and pharmacies, and other areas of interest such as harbors, police stations and liquor stores. Oh yeah, cemeteries are clearly marked as well.

Looking at the map, I realize I’m totally screwed. First off, I live in a food desert, so there’s not going to be much to scavenge. There isn’t much retail, and no stores that would be of use to me. I do live close to a hospital and a harbor, but those things are about equidistant from me, with an enormous cemetery in the third direction.

Doesn’t look good folks.

Anybody have a particularly good or particularly bad location?