Open Faced Tomato Sandwiches

The first Friday of the month is reserved for recipes. You can see additional First Friday Food posts here.

The Reason:

Laziness. Laziness is the reason we made this.

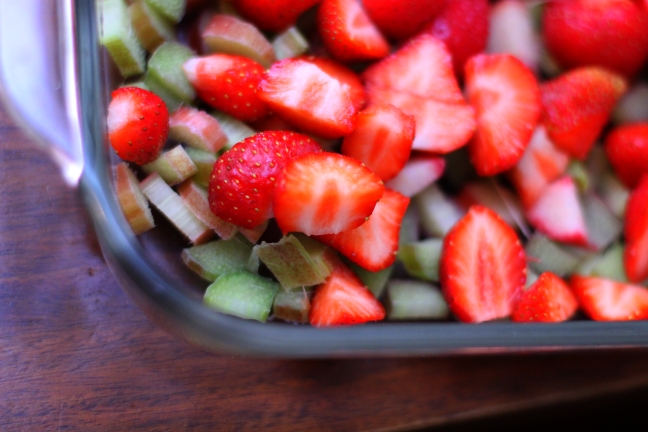
The kids were gone and we had these tomatoes from the garden and we said, “hey, we should just, like, eat these.”

That’s how magic happens, folks.

The Journey:

I’m sure you could do this in any number of varieties, but we made two kinds and they were so good that we didn’t mess with it. So we always make the same:

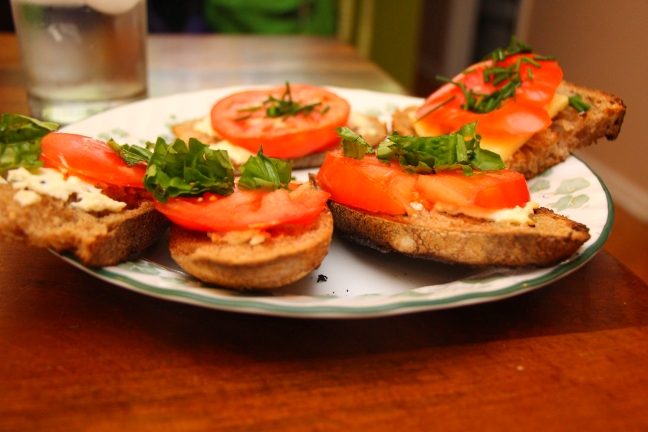
  1. Tomato, sharp cheddar, and chives
  2. Tomato, boursin, and basil

It is absolutely mandatory that the tomatoes be fresh from a garden, though. Don’t defame brilliance with your sub-par, tasteless, grocery store tomato-shaped orbs.

2015_07_18_2044

The Verdict:

Alright, look. So it’s not really a recipe, and I’m sure I didn’t invent it. It’s tomatoes, cheese, and bread, toasted. It doesn’t matter. IT IS SO RIDICULOUSLY TASTY. Just make it.

2015_07_18_2043

The Recipe:

  • Tomatoes
  • Cheese
  • Bread
  • Fresh herbs
  1. Grow the tomatoes
  2. Slice the tomatoes
  3. Toast the bread in the broiler or on the grill or in a toaster oven or in a toaster
  4. Put some cheese on the bread
  5. Put a slice of tomato on the bread
  6. Put it back under the broiler or on the grill or in a toaster oven (But NOT back in the toaster! This is important!)
  7. Sprinkle some herbs on it.

Burst Tomato Galette with Corn and Zucchini

The first Friday of the month is reserved for recipes. You can see additional First Friday Food posts here.

The Reason:

Recently, I received this email from Sara in regards to the recipe:

“This is not on your blog?!  Must be made, photographed, and eaten weekly in august.  Get ready.”

And here we are.

2015_07_19_2091

The Journey:

You don’t *have* to start with corn from the grill, but on the other hand, why wouldn’t you?

2015_07_18_2042

I really don’t remember how we stumbled upon this recipe in the first place. This is one of those recipes where the sum is greater than the whole of its parts. I mean, sure it sounds good, and that’s why we tried it. But once the first forkful hits your mouth…

2015_07_19_2085

I do want to mention that the dough is the stickiest thing you can imagine. Even though I’m telling you this, there will still come a time when you think you’ve made a mistake. You can’t possibly flatten this into something flat, and even if you did, it would never turn out.

That is just a normal part of the process.

2015_07_19_2084

2015_07_19_2086

Somehow you manage to form this sticky mess into something resembling a sloppy pizza and you think, “What a disaster. I am definitely not making this again.” And then you eat it, and then you don’t really care what it looked like while you were making it.

2015_07_19_2089

The Verdict:

Om nom nom nom nom!

This is the perfect summer meal. Tomatoes, corn, and zucchini, and just enough cheese to pull it all together. The crust is like magic; somehow it comes out perfect every time, no matter how sure you are that *this time* you messed it up.

2015_07_19_2094

The Recipe:

Recipe from Smitten Kitchen:

For the pastry:

  • 1 1/4 cups all-purpose flour
  • 1/4 teaspoon table salt
  • 8 tablespoons cold, unsalted butter, cut into pieces
  • 1/4 cup plain yogurt or sour cream
  • 2 teaspoons fresh lemon juice
  • 1/4 cup ice water

For the filling:

  • 1 tablespoon olive oil
  • 1/4 teaspoon coarse Kosher or sea salt
  • 3 cups cherry or grape tomatoes
  • Red pepper flakes
  • 1 ear corn, cut from the cob (about 1 cup)
  • 1 small zucchini or summer squash, diced
  • 1 bundle scallions, thinly sliced
  • 1/2 cup grated parmesan

Glaze:

  • 1 egg yolk beaten with 1 teaspoon water

Make dough:

  1. Whisk stir the flour and salt in the food processor.
  2. Cut in bits of butter until the mixture resembles coarse meal, with the biggest pieces of butter the size of tiny peas.
  3. In a small bowl, stir together the sour cream, lemon juice and water and add this to the butter-flour mixture.
  4. With your fingertips or a wooden spoon, mix in the liquid until large lumps form. Pat the lumps into a ball. Wrap with plastic and refrigerate for 1 hour, or up to 2 days.

Make filling:

  1. Add olive oil, tomatoes, salt and a pinch of red pepper flakes to your saute pan then cover and heat over high heat. Roll the tomatoes around from time to time so that they’ll cook evenly.
  2. In a few minutes, you’ll hear some putts and pops as the tomatoes burst a little. When most have, remove lid, turn heat down to medium and add zucchini chunks.
  3. Saute for two minutes, until they soften.
  4. Add corn and cook one minute.
  5. Add scallions, just stirring them in, then turn off heat.
  6. Adjust seasonings if needed.
  7. Transfer mixture to a large plate and spread it out, so that it will cool faster. You want it cooled to at least lukewarm before assembling the galette.

Assemble galette:

  1. Heat oven to 400 degrees.
  2. On a parchment-lined baking sheet, roll the dough out into a 12-inch round and it really doesn’t need to be perfectly shaped.
  3. Sprinkle tomato-zucchini-corn mixture with half of parmesan and spoon the mixture into the center of the dough, leaving a 2-inch border. If any liquid has puddle in plate, try to leave it there as you spoon.
  4. Sprinkle with almost all of remaining parmesan, leaving a pinch or two behind for the crust.
  5. Fold the border over the filling, pleating the edge to make it fit. The center will be open.
  6. Brush crust with egg yolk glaze. Sprinkle glaze with last pinches of parmesan.

Bake the galette:

  1. For 30 to 40 minutes, or until puffed and golden brown.
  2. Remove from the oven and let stand for 5 minutes, then slide the galette onto a serving plate. Cut into wedges and serve hot, warm or at room temperature.

Baked Feta With Tomatoes

The first Friday of the month is reserved for recipes. You can see additional First Friday Food posts here.

The Reason:

I haven’t talked about our garden much this year, but gardens mean tomatoes. It’s a little early yet, but I want to get this one out there so you have everything ready to go as soon as tomato season starts to pick up. (Shhh, this is so good, we even sometimes make it with tasteless store-bought tomatoes!)

IMG_5215

The Journey:

The ingredients seem too simple, somehow. I mean, it’s mostly feta, tomatoes, and a red onion. So what, you know? This is absolutely one of those where the sum is greater than its parts. Trust me on this! As good as those things sound, baked all together, they are better.

The feta doesn’t really melt, just gets soft and warm, and delicious…

IMG_5207

The thing I like about this is that you can absolutely impress your guests with it as a fancy appetizer, or else just eat it as meal. Or eat it by yourself. A whole 8-ounces of feta, aaaaall to yourself.

Mmmmmm lovely, salty feta.

IMG_5216

The Verdict:

It’s really simple to make, only takes one dish, and you don’t even need silverware to eat it. The crackers *are* your silverware. Edible silverware!

IMG_5218

The Recipe:

Recipe from Smitten Kitchen (minus the olives!):

  • 1 cup cherry tomatoes, halved
  • 1 clove garlic, minced
  • 1/4 cup thinly sliced red onion
  • 2 tablespoons finely-chopped fresh flat-leaf parsley, divided
  • 1 teaspoon dried oregano
  • 1 teaspoon olive oil
  • Freshly ground black pepper
  • 1 8- to 10-ounce block feta
  1. In a bowl, mix the tomatoes, olives, onion, garlic, 1 tablespoon of the parsley, oregano, olive oil and a few grinds of pepper.
  2. Heat oven to 400°F. Place the block of feta in the middle of your dish. Pile the tomato mixture on top of the feta. Bake for 15 minutes.
  3. The feta will not melt, just warm and soften. Garnish with parsley and serve with crackers; eat immediately. As it cools, the feta will firm up again. We found that the dish could be returned to the oven to soften it again. We did this with leftovers, too.

Strawberry Rhubarb Crumble

The first Friday of the month is reserved for recipes. You can see additional First Friday Food posts here.

The Reason:

Another catch up recipe post, but this one needed to be posted RIGHT AWAY so as not to miss strawberry season.

And you know what else is in season during strawberry season? Rhubarb.

2015_06_14_1889

The Journey:

Well, the journey starts with fresh-off-the-plant strawberries, naturally. Here, Oliver has one to get you started:

2015_06_13_1870

Rhubarb is one of my favorite things. Adding something a little sour in with the sweet just hits all the right tongue spots, you know?

When I was a kid, we had rhubarb growing between the shed and the fence, so we always had a good supply (until we tore down the shed and all the rhubarb died). There are lots of rhubarb recipes in my family, so I kind of thought everybody felt this way about rhubarb. As I get older, I find that many people just don’t know about the glory and majesty of rhubarb, including Sara. I have been working on her for years, but I think this recipe is the one that finally brought her to the dark side.

2015_06_14_1896

Oh, and if you’re new to rhubarb, don’t eat the leaves. I always heard they were poisonous, which is another plus for rhubarb. I like to live dangerously.

(Seriously though, is it poisonous? Because now that I think about it, that sounds like some B.S. that was told to me as a kid to keep me from gnawing the rhubarb raw, like a garden pest, before we could harvest it.)

The Verdict:

Strawberries and rhubarb go together like peanut butter and jelly. Like…like sweet and sour. I mean, literally, like sweet and sour.

The only way this could be better is if you ate it warm, right out of the oven, with a little vanilla ice cream on top…

2015_06_14_1898

The Recipe:

  • 5 cups strawberries, cored and diced
  • 5 cups rhubarb, diced
  • 3/4 cups sugar
  • 1 Tablespoon cornstarch

Topping:

  • 1 cup flour
  • 2/3 cup brown sugar
  • 2/3 cup butter, melted
  • 2/3 cup oats
  • 2/3 cup walnuts, chopped
  • 2/3 teaspoon cinnamon
  • 2 dashes, nutmeg
  1. Preheat oven to 375.
  2. Put cut strawberries and rhubarb into a 9×13 glass pan. Mix in sugar and cornstarch.
  3. In a separate bowl, mix flour, brown sugar, cinnamon, nutmeg, oats, nuts, and butter. Sprinkle on top of fruit.
  4. Bake for 45 minutes. Serve warm, with ice cream.

Balsamic Strawberry Jam

The first Friday of the month is reserved for recipes. You can see additional First Friday Food posts here.

The Reason:

We make a lot of jam. I mean a LOOOOT of jam. Our pantry is stocked with apocalypse-preparation levels of jams, marmalades, curds, chutneys, and compotes. We have an average of about 5 open variety of jams in our fridge at any given time. Short of Frank Smuckers, there are not many people who have more jam on hand than us.

And none of those jams, none of them, are better than balsamic strawberry jam.

2015_06_14_1885

The Journey:

It all starts with the fresh strawberries, of course.

Although Sara does most of the canning, it is something of an “all hands on deck” situation. The kids do seem to honestly enjoy the fact that they get to help make the food (although, it’s possible they are just humoring me). Especially something as delicious as jam.

2015_06_14_1881

Now, I know what you’re thinking: balsamic vinegar in jam? That sounds absolutely disgusting. Why would I want to pollute something as simple and delicious as strawberries and sugar with balsamic vinegar?

I DON’T KNOW.

But you do. Oh, how you do. I’m afraid you’re just going to have to take my word on it. I’m something of an expert, you know.

2015_06_14_1880

The Verdict:

Did I mention that there is no better jam? There is no better jam.

Use it on whatever you use jam on, but also try it drizzled on some vanilla ice cream. Heavenly.

Naturally, no recipe is complete without the secret ingredient: one photobomb.

2015_06_14_1887

The Recipe:

Recipe adapted from Farmish Momma:

  • 8 cups chopped strawberries
  • 3 cups turbinado sugar (white sugar would work too)
  • 5 tbsp balsamic vinegar
  1. Put the strawberries, sugar and balsamic vinegar into a pot and cook on medium high.
  2. Mash the berries a little to get the juice out. Once it is boiling, lower to medium and let cook for about 25-30 minutes until it passes the freezing plate test (drop a little bit on a plate you had in the freezer and if it does not drip and gels up you are done).
  3. Process in whichever way you use to can preserves (might I recommend this excellent canning tutorial). Makes about 5 half-pints.