Cranberry Almond Muffins

The first Friday of the month is reserved for recipes. You can see additional First Friday Food posts here.


Hi guys. Evelyn speaking.

As a advertisement for my business Party, Celebration, for all of the Nation, (Which comes with your choice of a party dessert, by the way), I am doing a guest post on my dad’s blog. I am doing step by step directions, so if you don’t like my method, go ahead and scroll all the way down for the recipe.

1.Preheat your oven to 400 degrees F.

2.Go ahead and put the dried cranberries and water on the stove. You can keep them on there for about 3 minutes, but since I tend to be the slower type of baker, keeping it on the lowest heat can be okay. Just make sure the water doesn’t completely evaporate.

IMG_0281

3. Mix the dry ingredients together in a bowl. (It should be mixed, the picture is only like this for decoration). Put like 5 pinches of lemon zest and put the rest in the freezer-you can use it to make scones.

IMG_0282

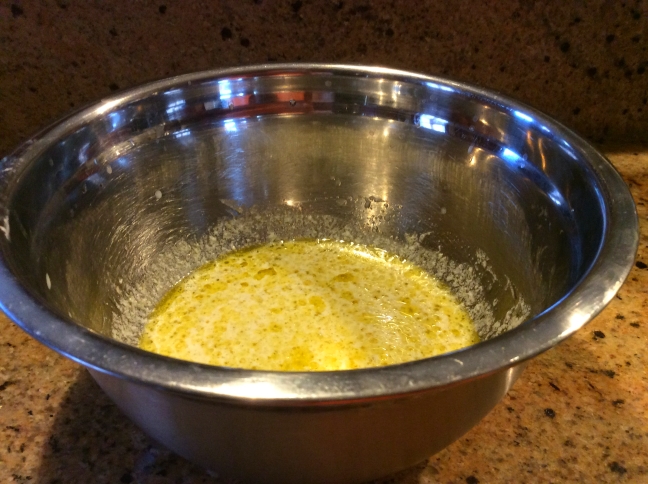
4. In a separate bowl, mix the wet ingredients. If you are juicing (is it juicing or de-juicing?) a lemon, keep lemon juice clear of any cuts. It will sting bad if the two come into contact.

IMG_0283

5. Mix the the wet ingredients into the dry until ALMOST combined. Drain the water out of the cranberries, and fold them into the mixture.

6. Grease some muffin tins and put the batter in. It should make 12 muffins, so if you have less, even it out between all 12. Then put three sliced almonds in a triangular shape on top of all the muffins. Bake for 18-20 minutes. Tip: Do not lick the spoon. This muffin batter does not taste good before baking. Belive me; I tried.

IMG_0290

7. Let the muffins cool on a cooling rack. Eat them with fruit or at least a glass of water because they tend to be on the dry side, (It’s not your fault).

IMG_0334

The Recipe:

(It’s from the Vegan Yum-Yum cookbook.)

  • 1/2 rounded cup dried cranberries in 1/2 c. water
  • 2 c. flour
  • 1/3 c. sugar
  • 2 tsp. baking powder
  • 1 tsp. baking soda
  • 1/4 tsp. salt
  • 1 TBL. cornstarch
  • zest from 1 lemon
  • 1 c. milk
  • juice from 1 lemon
  • 1/3 c. olive oil
  • 1 tsp. vanilla extract
  • 1 tsp. almond extract
  1. Preheat oven to 400F.
  2. Place the cranberries and water in a small saucepan and heat until simmering.  Simmer for 3 minutes then remove from heat.
  3. In a large bowl, mix flour, sugar, baking powder, baking soda, salt, cornstarch, and lemon zest.
  4. In a separate bowl, mix together the milk, lemon juice, veggie oil, vanilla, and almond extracts.
  5. Gently fold the wet ingredients into the dry until almost combined.  Drain the cranberries and fold into the batter, mixing until just combined.
  6. Fill a muffin tin with batter, top with a few sliced almonds, and bake for 18 to 20 minutes.

Black Bean, Sweet Potato, and Quinoa Chili

The first Friday of the month is reserved for recipes. You can see additional First Friday Food posts here.

The Reason:

Okay, so I missed that LAST Friday was actually the first Friday of the month. SO SUE ME.

I mentioned last month that I had a fall recipe queued up and ready to go, and this is it. If I were going to a chili cookoff, this is the recipe I would bring. It’s totally chili, and yet it’s totally not chili. Totally unique, and totally wonderful.

IMG_2524

The Journey:

Like any good chili, this is mostly just throwing everything in a pot and letting it sit. However, in this case, everything means, like, EVERYTHING.

IMG_2525

So, you know, you save on the cooking part, and you pay on the cleaning-up-the-disaster part.

The Verdict:

I think you just have to try this to understand it. I’m not sure words can really capture the strange, yet strangely working combinations of flavor here.

And as a side note, we doubled the recipe to have enough for a 2nd night. Just saying…

IMG_2537

The Recipe:

Recipe from The Kitchn.

  • 1 tablespoon olive oil
  • 1 onion, chopped
  • 5 garlic cloves, chopped
  • 1 1/2 tablespoons chili powder
  • 1 tablespoon ground coriander
  • 1 14.5-ounce can fire-roasted tomatoes
  • 1/2 pound dried black beans, rinsed well
  • 1 chipotle chile from canned chipotle chiles in adobo, minced
  • 1 teaspoon dried oregano
  • 3/4 teaspoon kosher salt
  • 1 1/2 cups sweet potatoes (2-3 small), cut into 1/2-inch cubes
  • 1/4 cup quinoa, rinsed and drained
  • sour cream, to top (optional)
  • green onions, chopped, to top (optional)
  • fresh cilantro, chopped, to top (optional)
  1. Soak black beans in hot water for several hours (or overnight)
  2. Heat the oil in heavy large pot over medium heat. Add the onion and cook until soft and beginning to brown, 6-7 minutes. Add garlic, chili powder, and coriander and stir. Cook together for 1 minute.
  3. Stir in the tomatoes with their juices, beans, chipotle pepper, and oregano. Add 4 cups of water and bring to a boil. Reduce heat to low, cover with lid slightly ajar and simmer until beans are flavorful and tender, anywhere from 2 – 4 hours (depending on the age of your beans). Even with pre-soaking, we cooked the beans for about 3 hours.
  4. After ~3 hours of cooking, add the sweet potatoes, quinoa, and salt. Place the pot’s lid back on slightly ajar and allow to simmer on low heat until the beans are soft and the sweet potatoes and quinoa are cooked through (about another hour). Add more water if the chili becomes too thick. Serve with sour cream, cilantro, and green onion.

Grilled Lemon-Thyme Chicken

The first Friday of the month is reserved for recipes. You can see additional First Friday Food posts here.

The Reason:

I can’t believe that we’re already into August. Summer just started, and yet here we are, in the dog days. How can this have happened??

I have a nice fall recipe all lined up for next month, but I refuse to let summer go without a fight, so here is the most summer-iest, summer recipe I have.

The Journey:

The original recipe called for oregano, and I don’t really remember how we ended up using thyme instead, but it is absolutely the way to go. I will grant you that it is a real pain in the rear to try to get all those tiny leaves off the stems and chopped up, but it is absolutely worth it.

2017_07_08_3223

The way these things smell on the grill… It is summer personified. It smells like one of those late-summer, outdoor festivals, where you’ve been baking in the sun, surrounded by family, and there’s some kind of food tent where they’ve got one of those enormous, six foot long grills sizzling away. And you’re just kind of standing around with a cold drink in your hand, maybe listening to a band play or playing bags.

This is the smell that that grill is making, and thyme is the secret ingredient.

2017_07_08_3228

The Verdict:

This is one of those recipes that we have been making since forever, and I always go, “How has that never been on the blog before?” Seems inconceivable.

Make this one before the summer is over, and thank me later.

2017_07_08_3232

The Recipe:

Recipe slightly modified from Bon Appetit.

  • 2 tablespoons fresh lemon juice
  • 2 tablespoons coarsely chopped fresh thyme (or oregano, as per the original recipe)
  • 2 garlic cloves, pressed
  • 1 tablespoon extra-virgin olive oil
  • 1 1/2 teaspoons coarse kosher salt
  • 1 teaspoon finely grated lemon peel
  • ~8 pieces of chicken
  1. Whisk first 6 ingredients in small bowl. Season to taste with freshly ground black pepper.
  2. Marinate at room temperature 30 minutes or in refrigerator up to 2 days, turning occasionally.
  3. Prepare barbecue (medium-high heat). Place chicken, with some marinade still clinging, on grill rack; grill chicken until cooked through and golden brown on all sides, turning frequently, about 30 minutes.
  4. Transfer to plates and serve.

Caramelized Banana Dutch Babies

The first Friday of the month is reserved for recipes. You can see additional First Friday Food posts here.

The Reason:

As I said the last time I talked about Dutch Babies, sometimes you want a delicious, warm pastry for breakfast, but just don’t have time to go full-on pancake.

Well I would further add to that, sometimes you don’t have time to slice up a bunch of peaches or apples, or peaches are not in season. Enter, banana dutch babies:

2017_05_14_3067

The Journey:

One of the coolest things about dutch babies is the way they puff up in the pan, then deflate when you take them out of the oven (or, at least, *I* think it’s cool, but none of the kids seem to be as excited about it as I am…with this and a lot of other things)

2017_05_14_3072

Pictured: mid-puff dutch babies! (And look! It even fits in the oven with sheet pan bacon!)

The Verdict:

We have actually been making these for years, so about time I got around to putting this one up. It is easy and delicious. The only problem I have is that two are no longer enough for our family!

2017_05_14_3074

Oh wait, I do have one other problem with it.

We only have one cast iron pan, which means my 2nd dutch baby is in a pan that is oven safe, but I don’t normally put in the oven. That means that I can NEVER, EVER remember that the handle will be scorching hot, and constantly grab it for all it’s worth.

Learn from my constant, repeated stupidity. BE VERY CAREFUL ABOUT GRABBING HOT PANS WITH YOUR BARE HANDS!

The Recipe:

Recipe adapted slightly from Chef Druck.

  • 6 eggs
  • 1/2 teaspoon of salt
  • 1 cup of flour
  • 1 cup of milk
  • 2 teaspoons of vanilla
  • 2 tablespoons of sugar
  • 4 tablespoons of butter
  • 1/2 cup of brown sugar
  • 4 bananas
  1. Preheat oven to 450 degrees.
  2. Get two ovenproof skillets out (cast iron of you have them!)
  3. Combine the vanilla, eggs, milk, granulated sugar, salt and flour in the blender. Pulse until mixed.
  4. Heat both pans on medium high heat. Add 2 tablespoons of butter to each pan along with half of the brown sugar. As soon as the sugar is melted, slice two bananas into each pan and turn a few times to coat well on both sides. Let them brown slightly. Pour in half the batter to each pan and put both pans in the oven immediately.
  5. Cook for 15 minutes, until the Dutch Babies are golden and puffed up. Optionally, douse with a big cloud of powdered sugar (we usually skip this) and serve immediately

Sheet Pan Hash Browns and Oven Baked Bacon

The first Friday of the month is reserved for recipes. You can see additional First Friday Food posts here.

The Reason:

Obviously this is a pancake sort of blog, but *eeeevery once in awhile* I might eat something else for breakfast (shocking, I know). And when I do, there are no better accoutrements than hashbrowns and bacon.

(This is, however, a bacon sort of blog. No exceptions)

(Except maybe sometimes sausage)

The Journey:

Regular hashbrowns are pretty amazing. I mean, I wouldn’t have thought you could improve on hashbrowns. But you CAN and now you MUST.

2017_04_24_3050

Usually I make hash browns in a pan, but then I get entirely too impatient to eat them, so I don’t let them fry long enough to actually get crispy. Instead they end up as kind of warm, mush potatoes, that are still delicious. Intellectually I understand that they would be better if I could wait for a few more minutes, but…

However, imagine you could make ENTIRELY CRISPY hash browns, with no effort?!? And since they’re in the oven you don’t even have to sit there and look at them, waiting for them to crisp up but growing increasingly more impatient.

2017_04_24_3055

As for the bacon, I have cooked a slice or two in my day. Usually the grease is flying everywhere, burning your hands like liquid magma as you try (unsuccessfully) to flip the piece over with a fork. Then it starts curling up, so you try to hold it down, but it doesn’t work so you end up with one side that’s crispy and the other side that’s just like raw fat.

No more. This is going to change your life my friend.

It is so unbelievably simple, you end up with perfectly cooked, flat pieces, and you don’t even have to stand there and shepherd it the whole time. Set it and forget it. The strips are actually less greasy too, since most of it stays in the pan. AND! AND! It’s easier to clean up: just wait until the grease congeals a little bit, crumple the parchment paper, and throw it away.

Sometimes you really can have your cake and eat it too. And the best part is that you can cook it in the oven AT THE SAME TIME as the hash browns!

2017_04_24_3054

The Verdict:

The one slight knock I would say is that I am a crispy bacon kind of guy, and you can’t *quite* get the bacon to that perfect level of crispiness. However Sara, who claims I always overcook the bacon, is quite satisfied (and honestly this is probably somewhere in the middle between us as far as our preferred texture).

Still, that is a very minor complaint, especially when weighed against the obvious advantages.

I have no knocks against the hash browns whatsoever.

2017_04_24_3057

And naturally, it is Alex approved, so what more could you ask for?

2017_04_24_3060The Recipe:

Recipe from Macheesmo.

  • 1 bag of frozen hash browns (1 lb 4 oz)
  • 2 tablespoons unsalted butter
  • 1 tablespoon olive oil
  • 1/2 teaspoon kosher salt
  • 1/2 teaspoon black pepper
  • 1/2 teaspoon chili powder
  • 1/2 teaspoon garlic powder
  • 1/2 cup grated Parmesan
  1. Line a sheet pan with parchment paper and preheat oven to 400 degrees.
  2. In a microwave safe bowl, combine butter, oil, and spices. Microwave on high for 30 seconds to melt butter.
  3. Stir spice mixture into potatoes.
  4. Stir in grated Parmesan cheese.
  5. Spread potatoes out on sheet pan in a single, even layer. Some overlap is inevitable, but try to make it as even as possible.
  6. Place sheet in a preheated oven on the bottom rack for 15-20 minutes. When edges of hash browns are browning nicely, move sheet pan to the very top rack. Bake for another 10-15 minutes so top can crisp up. Don’t stir the potatoes!

Recipe (is this really a recipe?) from The Pioneer Woman.

  • Bacon
  1. Preheat oven to 400 degrees
  2. Cook for 15 – 22 minutes (depending on thickness of bacon)