Russian Yogurt Pancakes

The first Friday of the month is reserved for recipes. You can see additional First Friday Food posts here.

The Reason:

“Wait a minute,” you’re saying. “This is not the first Friday of the month. Is there something wrong with my calendar?” No, you’re right. But I have so many food posts queuing up that I need to clear out a little inventory.

And it’s been far, FAR too long since we’ve had a pancake recipe on here!

The Journey:

These are yogurt pancakes, and as such, they take a lot of yogurt. I highly recommend making your own, which is cheap and simple. In fact, you can even use old yogurt that is starting to go bad!

2013_03_31_9816

These are some of the most amazing, moist pancakes that I’ve ever had. The texture is absolutely perfect. Usually my pancakes are a little on the tough side since I use only whole wheat flour, which tends to be a little denser. The downside is that these are a little hard to work with in the pan; they are very tricky to flip. It’s well worth the effort though, and who cares what they look like anyway!

2013_03_31_9820

My advice to offset this is to make very small pancakes. They’re easier to flip, and you can pretend like you’re a giant who needs to eat 80 pancakes for breakfast every morning.

2013_03_31_9823

The Verdict:

These are so amazing. They’re moist and the yogurt gives them a buttery flavor, so you don’t need to put extra butter on top. The original recipe says you can top them with something savory instead of sweet, which I could totally see. And you can even use up yogurt that’s going bad! No downsides on this one. This is in our regular pancake rotation.

2013_03_31_9824

The Recipe:

Recipe from A Girl’s Guide to Butter.

  • 4 cups plain yogurt (going bad OK)
  • 3 eggs
  • 4 tablespoons sugar
  • 1 teaspoon salt
  • 2 teaspoons baking soda
  • Enough (whole-wheat) flour to make a medium-thick batter (one that holds its shape but is still a liquid rather than a paste). I use a little less than 2 cups.
  • oil, for frying (we use coconut oil)
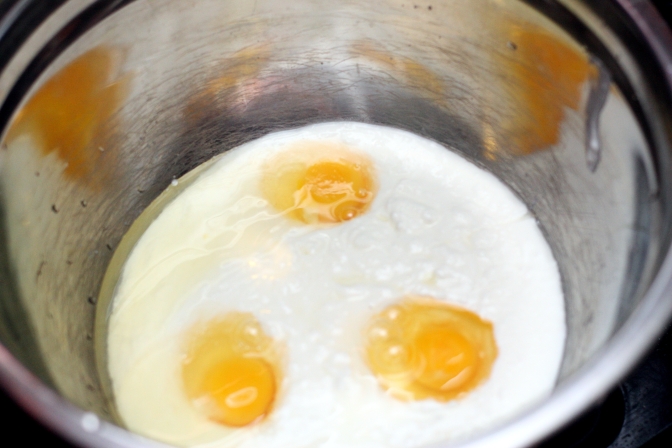
  1. Mix all the ingredients together except for oil, and beat until smooth.
  2. Heat the oil in a cast iron skillet over medium-high heat until almost smoking.
  3. Using a large tablespoon, spoon the batter into the pan in the form of small oval pancakes.
  4. Fry on one side until golden-brown, then flip, reducing the heat to medium, and cook until the other side is golden-brown as well. Be sure to add more oil if your skillet becomes dry.
  5. Remove to a platter and top with any of the desired toppings.

Italian Rice and Beans

The first Friday of the month is reserved for recipes. You can see additional First Friday Food posts here.

The Reason:

We have an endless, insatiable hunger for quick, healthy meals that can be made on nights when we are busy. This is one of our favorites in that category.

The Journey:

There’s really not all that much to say, which is exactly the beauty. You toss it in a pan, cook it quickly, and you serve it. The rice takes awhile, so you do have to remember to get a head start on it, but it’s not “active” cooking time.

2013_03_02_9724

2013_03_02_9726

2013_03_02_9728

The Verdict:

Wonderful. I don’t think I’ve ever tasted anything quite like it, which is probably why I don’t get sick of it very quickly. The mixture itself is so flavorful, that you can go pretty heavy on the rice ratio, and still have something amazing. This makes it pretty easy to scale up or down as needed. It’s also great as a reheated leftover for lunch the next day.

2013_03_02_9731

The Recipe:

Recipe from Vegan Yum Yum (note, we use a modified version of the one in the cookbook, which is slightly different than the one on the webpage).

  • 1 cup brown rice, uncooked
  • 1 tablespoon of olive oil
  • 1/2 teaspoon of dried thyme (or 2 – 3 teaspoons fresh)
  • 1/2 cup sun-dried tomatoes (vacuum packed if you can find them, oil-packed if not), cut into strips
  • 1/4 cup pine nuts (you can substitute sunflower seeds)
  • 1 can canellini beans, rinsed and drained
  • 1/2 teaspoon salt
  • 1 tablespoon balsamic vinegar
  • 4 ounces of baby spinach
  • zest from 1 lemon
  1. Cook the rice.
  2. When the rice is finished, heat the olive oil in a saute pan over medium heat.
  3. Add the herbs, tomatoes, and pine nuts.
  4. When the pine nuts start to turn golden brown, add the beans. (Be very careful not to burn the pine nuts or sun dried tomatoes!)
  5. Toss gently, trying your best to keep the beans whole.
  6. Add the salt and vinegar and stir gently. Turn the heat to low.
  7. Place spinach in one layer on top of the beans. Cook for ~3 minutes until spinach starts to wilt.
  8. Mix gently and taste. If it doesn’t have that “pop”, add in a little bit more vinegar and salt to taste.
  9. Grate the lemon zest on the top of the rice and beans and serve.

Booze (Homemade Irish Cream, Amaretto, and Coffee Liqueur)

The first Friday of the month is reserved for recipes. You can see additional First Friday Food posts here.

The Reason:

It really never occurred to me that you could just like make liqueur. I assumed it could only be concocted in a lab, with lab coats, beakers, and Bunsen burners under bubbling test tubes. Not so; as it turns out it’s actually comically simple. And this (in addition to homemade vanilla extract), makes for some really easy Christmas gifts for hard-to-shop-for people.

P.S. Don’t bother trying to make homemade almond extract. Unlike the rest, almond extract is apparently impossible to make. It is, however, very easy to make homemade almond-sludge-vodka. But then again, that’s really more of a niche market.

The Journey:

Well, the first thing you have to do is to go to Costco and buy some really ridiculously enormous bottles of booze.

2013_02_10_9651

There’s really not much to say here. You do a little boiling, you do a little mixing, and then you bottle it up and save it for  a rainy day. Or, more likely, you bottle half of it up, while “taste testing” the other half right out of the pot.

2013_02_10_9653

The amaretto and coffee liqueur are a little more stable, but the Irish cream has a timer because of the cream. It doesn’t really matter though, because none of these are going to last very long.

The Verdict:

You could drink any of these on the rocks, but I like them in milk, possibly with a little vanilla vodka. Sara finds the coffee liqueur works well in cocoa, and the Irish cream is naturally good in coffee. You can also make a pretty good amaretto sour with just amaretto and lemon juice.

It’s really hard to pick a favorite here, but I think I’m going to have to go with the amaretto. However, you can’t go wrong with any of them.

And even if you do, you still have some really ridiculously enormous bottles of booze from Costco…

2013_02_10_9650

The Recipe:

Homemade Irish Cream from Design Sponge

  • 1 cup strong coffee
  • 1 1/2 cups heavy cream
  • 1 Tablespoon dark cocoa
  • 1 Tablespoon sugar
  • 1 teaspoon honey
  • 1/2 teaspoon vanilla extract
  • 1/2 teaspoon almond extract
  • 1 14-ounce can sweetened condensed milk
  • 2 cups Irish whiskey (we used Jameson, obviously)
  1. Bring the coffee to a gentle simmer in a medium-size saucepan.
  2. Add the cream, cocoa, sugar, honey and extracts, and whisk thoroughly.
  3. Simmer over low heat for about 20 minutes, whisking frequently, until the mixture begins to thicken.
  4. Remove the saucepan from the heat; whisk in the sweetened condensed milk.
  5. Transfer the mixture to a bowl, and set aside to cool for a few minutes.
  6. Whisk in the whiskey until completely blended.
  7. Store in the refrigerator.

Homemade Almond Liqueur from All Recipes

  • 1 cup water
  • 1 cup sugar
  • 1/2 cup brown sugar
  • 2 cups vodka
  • 2 Tablespoons almond extract
  • 2 teaspoons vanilla extract
  1. Combine water and sugars in a saucepan over medium heat. Heat until the mixture is boiling, and all of the sugar is dissolved.
  2. Remove the pan from the heat and let the mixture cool for 10 minutes.
  3. Stir vodka, almond extract and vanilla extract into the mixture.
  4. Store in a sealed bottle.

Homemade Coffee Liqueur from Bon Appetit

  • 2 cups water
  • 3 cups sugar
  • 3/4 cup instant coffee granules
  • 2 cups vodka
  • 1 1/2 teaspoons vanilla extract
  1. Bring 2 cups water to boil in heavy medium saucepan. Add sugar and coffee.
  2. Reduce heat to very low. Stir just until sugar and coffee dissolve.
  3. Remove from heat. Let stand until cool, about 1 hour.
  4. Mix vodka and vanilla into coffee syrup.
  5. Pour into large jar. Cover; let stand at room temperature at least 3 weeks and up to 6 weeks.

Pimentón Roasted Chicken, Carrots and Potatoes

The first Friday of the month is reserved for recipes. You can see additional First Friday Food posts here.

The Reason:

The reason for this recipe is sort of round-about. Sara likes to make chicken stock, but it’s kind of a pain. In order to maximize the efficiency of this activity, it helps to have a recipe involving TWO ENTIRE CHICKENS, so you can do all the chicken stock in one go. So yeah, the big plus of this recipe is that it outputs two chicken corpses.

The Journey:

Okay, all that being said, stumbling upon this recipe was sort of a happy accident, because the chickens really are good. The first time we made this, we didn’t quite have enough potatoes, so Sara added some carrots. This ended up being another happy accident, and we’ve made it that way ever since.

2013_01_20_9581

Sara and I both agreed that the chicken sometimes looks like a dead baby, especially when you lift it by the legs. If that wasn’t enough, the goopy red rub makes you look like you just murdered said baby. Said tasty, tasty baby.

2013_01_20_9583

The Verdict:

Honestly, I’m not really a fan of whole babies chickens, but the carrots and potatoes are TO. DIE. FOR. And of all the whole chicken recipes I have ever had, this one is the best.

But seriously, the carrots and potatoes.

2013_01_20_9588

The Recipe:

Recipe adapted from Bon Appetit.

[Edited to include Sara’s modifications to the original recipe]

For chickens:

  • 8 garlic cloves, finely grated
  •  2 teaspoons kosher salt
  • 2 tablespoons olive oil
  • 2.5 tablespoons smoked paprika
  • 1 teaspoon cayenne
  • 1 teaspoon dried thyme
  • 2 3 1/2–4-pound whole chickens

For veggies:

  • 2-3 pounds Yukon Gold potatoes, unpeeled
  • 1 sweet onion, sliced
  • ~3 medium carrots, cut in similar size to potatoes
  • Kosher salt, freshly ground pepper
  • 1-2 tablespoons olive oil
  • Smoked paprika (for dusting)
  1. Mix garlic, salt, oil, and paprika, cayenne, and thyme in a small bowl; mix to blend well. Using your hands, smear paste all over outside of chickens, rubbing to coat the skin. It will be clumpy, don’t worry.
  2. Let chickens stand at room temperature for 1 hour.  Cut each potato in half lengthwise, then lengthwise into 4 thick wedges (steak-fry style). Place in a large bowl; season generously with salt and pepper. Drizzle in oil and toss well to coat. Spread potatoes in a single layer in a large roasting pan or on a large rimmed baking sheet.
  3. Preheat oven to 500°F. Place chickens side by side atop potatoes in roasting pan.
  4. Roast chickens and potatoes for 30 minutes. Remove from oven; turn potatoes, rearranging chickens if needed. Reduce oven heat to 425°F. Continue roasting chickens and potatoes until an instant-read thermometer inserted into thickest part of the thighs registers 165° F, 20-35 minutes longer. Let rest for 15 minutes before carving chicken. Keep potatoes warm in oven until chicken is carved and ready to be served.
  5. Transfer potatoes to 1–2 platters. Arrange chickens on top of potatoes. Dust lightly with smoked paprika.

Szechuan Pork and Green Beans

The first Friday of the month is reserved for recipes. You can see additional First Friday Food posts here.

The Reason:

Honestly? I think the reason was that we were looking for a recipe to use up ground pork. But this recipe is so good, you’ll definitely want to buy more ground pork, which leaves you more ground pork left overs…it’s a vicious circle.

The Journey:

Have you ever really smelled white pepper? Go smell it and come back. I’ll wait.

Okay, yes, it smells absolutely odious, but does it smell familiar to you? Because everyone around here agrees that it smells exactly like a hog farm. This is not a positive. I can barely bring myself to put it on my food. And yet, this dish is delicious. Maybe you need a little hog farm for the pork, I don’t know.

Schezuan is Chinese for “melt your face off”, or so I assume, because Schezuan food is spicy! This dish is no exception. I suppose you could try to make it less spicy, but honestly I wouldn’t bother. It would really take away from the dish. Serving it over rice helps with the heat a little bit, but if you have trouble with spicy food though, maybe you should avoid it.

The Verdict:

So yummy and so easy to make.

One word of warning though; do not buy Trader Joe’s soy sauce! I love Trader Joe’s, but we made that mistake and we’re still paying the price. We have to mix it in with Kikkoman a little at a time to get rid of it.

The Recipe:

Recipe from myrecipes.com.

  • 1 pound lean ground pork
  • 2 teaspoon cornstarch
  • 1/4 teaspoon salt
  • 1/8 teaspoon freshly ground white pepper
  • 1 Tablespoon olive oil (+ a few drops of seasame or peanut oil if you have them)
  • 5 cups cut green beans
  • 2 teaspoons minced fresh garlic
  • 4 tablespoons hoisin sauce
  • 2 teaspoons sugar
  • 2 teaspoons crushed red pepper
  • 4 teaspoons soy sauce
  • 4 cups hot cooked brown rice
  1. Combine the pork, cornstarch, salt and white pepper in a medium bowl.
  2. Heat oil in a large nonstick skillet over medium-high heat. Add pork mixture, beans, and garlic; cook 3 minutes or until pork loses its pink color, stirring to crumble.
  3. Combine hoisin, sugar, red pepper and soy sauce in a small bowl, stirring with a whisk.
  4. Add hoisin mixture to pan. Cook 2 minutes or until thoroughly heated, stirring frequently.
  5. Serve over rice.