On the sorry state of First Friday Foods

So, you may or may not have noticed that there has been a severe lack of First Friday Food recipes lately.

Part of it is that those posts take significantly more work than the average blog post, but the more major issue is that I just ran out of recipes! In the past 4 years, I’ve published over 60 recipes. Since I mostly use this feature as a handy reference to recipes we make a lot, I guess at some point I had just kind of posted all the recipes I needed to post.

Fear not! Now that summer has come around, it turns out I’ve got a few more recipes up my sleeve after all. However, in the future, look for First Friday Foods to become a little more sparse.

-The Management

Black Bean Chilaquiles with Grilled Corn Salsa

The first Friday of the month is reserved for recipes. You can see additional First Friday Food posts here.

The Reason:

Well, the reason is that Rick Bayless is a culinary god. If we pick a recipe at random from his cookbook, it is sure to be our new favorite.

In fact, Evie just recently told us this is her favorite meal.

The Journey:

I believe the first thing that piqued Evie’s interest is that this recipe includes lots and lots of chips.

2015_02_25_0831

This is actually quite a strange recipe. What you make is sort of a…brown lump. It’s like…brown, soggy nachos.

Hmm, this is not really selling it it.

Okay, well, it’s not much to look at, I will grant you, but it is delicious. And it is made further delicious by the toppings. Pretty much anything you would put on nachos works well here (cheese, sour cream, avocado, pickled radishes, etc.), but our two favorite toppings are smoky chipotle salsa, or grilled corn salsa.

2015_02_25_0833

This is a sweeter salsa (though still pretty spicy!), and the slightly blackened, grilled-corn flavor is just fantastic. It’s great for chips too (and anything else that you use salsa for), but it seems to work particularly well for chilaquiles.

The Verdict:

This is absolutely the tastiest brown…lump…loaf…thing I have ever eaten! We make this very frequently at our house, and the kids beg for it in their lunches the next day.

2015_02_25_0832

The Recipe:

Chilaquiles recipe from Rick Bayless’s Mexican Kitchen.

  • 2 cans of black beans (or 1 1/4 cups dried)
  • 1 cup vegetable or chicken broth (plus 5 cups broth or water if using dried beans)
  • 1/2 medium white onion, roughly chopped
  • 4 cloves garlic, roughly chopped
  • 3 canned chipotle chiles en adobo, plus 2 teaspoons adobo from the can
  • 1 teaspoon salt (not needed if using canned black beans)
  • 8 oz of thick tortilla chips (~8 loosely packed cups)
  1. If using dried beans, rinse them, then boil with onion, garlic, and 2 of the chiles, partially covered on medium to medium-low heat for about 2 hours. Add water if necessary to keep the beans submerged.
  2. Puree the beans (including liquid), onion, garlic, and 2 of the chiles in the blender.
  3. Add bean puree to a pot. Add up to 1 cup of broth until the consistency is that of a thin cream soup. Taste and season with salt (most likely not necessary if using canned beans). Bring to a boil over medium heat.
  4. Slice the remaining chile into strips.
  5. Add the tortilla chips and the chile. Stir to coat the chips well, and cook about 2 – 3 minutes (chips will continue to soften once off the stove, so do not overcook).

Salsa recipe adapted from Local Kitchen Blog.

  • 6 ears corn on the cob
  • 2 ½ lbs tomatoes, diced (if tomatoes are runny, let some of the juice run off)
  • ½ of a large yellow onion, diced
  • 4 jalapeno peppers, minced (we included the seeds)
  • 1 clove garlic, minced
  • 1 ¼ cups white vinegar
  • ¼ cup lime juice
  • 2 Tablespoons sugar
  • 1 ½ tsp salt
  • 1 ½ tsp cumin
  • ¼ cup, packed, chopped fresh cilantro
  1. Grill the corn (instructions here). Allow to cool, strip off husks and slice off kernels with a sharp knife. (Save the cobs for corn cob stock!)
  2. Prepare canner, jars, and lids.
  3. Combine vinegar, lime juice, sugar, salt and cumin in a large, wide-bottomed stockpot and bring to a boil over high heat. Add corn, tomatoes, onion, peppers and garlic and return to a boil. Lower heat and simmer for about 5 – 10 minutes, to reduce liquid slightly and allow flavors to blend.
  4. Add cilantro and return salsa to a boil. Remove from heat and ladle into hot jars to ½-inch headspace; bubble the jars, adjust headspace, wipe rims, affix lids and process for 15 minutes.
  5. Allow the jars sit for at least 1 month, for optimal flavor mingling

Charred Brussels Sprouts Carbonara

The first Friday of the month is reserved for recipes. You can see additional First Friday Food posts here.

The Reason:

Brussels sprouts, am I right folks?

Look, forget everything you think you know about Brussels sprouts. These ain’t your mama’s Brussels sprouts.

The Journey:

I’m not sure how exactly Brussels sprouts got such a bad reputation. They’re not any worse than any other vegetable, and better than a few. Mainly, I think the problem is that a certain previous generation never met a vegetable they couldn’t stew the life (read: flavor) out of (see also, spinach).

I would argue that if you categorically don’t like Brussels sprouts, you have probably never had them prepared properly.

2014_12_11_0457

So that’s the Brussels sprouts, but what about the pasta? Soo delicious. Cheese, eggs, butter, pancetta…not exactly a lean pasta I suppose, but a tasty one!

2014_12_11_0460

The Verdict:

We frequently eat the brussels sprouts by themselves as a side, but in the pasta, they are just plain delightful. This is a fantastic meal, make no mistake.

2014_12_11_0461

The Recipe:

Recipe adapted from Bon Appetit.

  • lb. brussels sprouts, trimmed, leaves separated
  • 1 lb. pasta (we use penne)
  • 1 tsp. Kosher salt
  • 2 oz. pancetta (Italian bacon), finely chopped (about ¼ cup)
  • tsp. coarsely ground black pepper, divided
  • ¼ cup (½ stick) unsalted butter, cut into pieces
  • cup grated Pecorino plus more for topping
  • large egg yolks, beaten to blend (use the leftover egg whites to make Cinnamon Roasted Nuts!)
  • Tbsp. olive oil, divided
  1. Preheat oven to 400 degrees.
  2. Cut Brussels sprouts in half and combine in a large bowl with 2 Tbsp. oil, 1 tsp. salt, and 1/2 tsp. pepper. Arrange on a baking sheet. Roast in the preheated oven for 30 to 45 minutes, shaking pan every 5 to 7 minutes for even browning. Brussels sprouts should be blackened. If leaves fall off, remove them from the oven and set aside (don’t throw them away, those are the most delicious!)
  3. Cook pasta in a large pot of boiling water (salted if desired), stirring occasionally, until al dente (about 5 minutes for fresh pasta). Drain, reserving 1 cup pasta cooking liquid. (Actually, assuming you are cooking the pasta at the same time as the pancetta, you will need to grab a cup of cooking liquid out while it is still boiling.)
  4. Meanwhile, heat 1 Tbsp. oil in a skillet over medium heat. Add pancetta and cook, stirring often, until slightly crisp, about 4 minutes. Add 1/2 tsp. pepper and cook, stirring, until fragrant, about 30 seconds. Immediately add ½ cup pasta cooking liquid to keep pepper from burning; reduce heat to low and gradually add butter, swirling skillet and adding more pasta cooking liquid as needed, until a thick, glossy sauce forms. (Taste as you go and switch to hot water once sauce is adequately seasoned.)
  5. Add pasta to skillet and toss to coat. Add Pecorino; toss to combine. Remove from heat; mix in egg yolks. Add reserved brussels sprout leaves; toss, adding pasta cooking liquid (or hot water) as needed to thin sauce.
  6. Serve pasta topped with more Pecorino.

Shredded Beer-Pork Tacos

The first Friday of the month is reserved for recipes. You can see additional First Friday Food posts here.

The Reason:

The reason is pork tacos.

The Journey:

This recipe requires a can of beer. Pretty much *any* can of beer. So use whatever you have, but I don’t see any particular reason to use a *good* can of beer.

005

I have had pork tacos before, but these have a magic trick. The magic trick is not to drink the other 5 cans of beer. That is not a magic trick; it may or may not help you enjoy pork tacos.

The magic trick is that, after you cook the pork all day in the crockpot, you cook it again. All the little pork pieces get crispy and delicious, and this is a waaaay better magic trick than drinking 5 beers.

(I remind you, the beer was “Name Tag”. Excuse me, “Name Tag Classic”. The magic trick would be keeping 5 cans of Name Tag Classic down.)

007

Crispy, crispy, criiiiispy pork

The Verdict:

This makes an amazing taco, and a lot of them too, so it’s good for serving a lot of people. We have served it to company. We have served it for birthday parties. We have served it for Christmas dinner. I am not joking.

This is a taco worthy of Christmas dinner.

2014_12_05_0437

The Recipe:

Recipe adapted from The Yummy Life.

  • 4 lbs.-ish boneless pork roast
  • 1 tsp. salt
  • 2 tsp. ground black pepper
  • 4 garlic cloves, minced
  • 1 large onion, minced
  • 2 cups salsa verde (store bought, or homemade)
  • 12 oz. beer
  1. Place pork in slow cooker. Pour on the beer. Also add beer to pork (ha ha). Sprinkle on the black pepper; top with the garlic, onions, and salsa verde.
  2. Cover and cook on high for 3 1/2 to 4 hours, or on low for 7 – 9 hours, until fork tender.
  3. Preheat oven to 300 degrees.
  4. Transfer cooked pork to cutting board and shred it using two forks; discard fat. Degrease the cooking liquid left in the pan.
  5. Spread out the shredded pork in a large, shallow baking pan. Pour up to 3 cups of degreased cooking liquid over the pork.
  6. Bake uncovered for 30 min. or until crispy pieces appear on top. Remove from oven and stir. Return to oven for 30 minutes or until crispy pieces appear again on top. Repeat baking, crisping, and stirring in 20 min. intervals until all or most of the liquid is gone from the bottom of pan. For a moister meat, cook until approx. 1/4″ liquid remains on bottom of pan, stirring remaining liquid back into the shredded pork. For dryer/crisper meat, cook until all liquid had cooked away.


Hearty Beef Stew and Yorkshire Pudding

The first Friday of the month is reserved for recipes. You can see additional First Friday Food posts here.

The Reason:

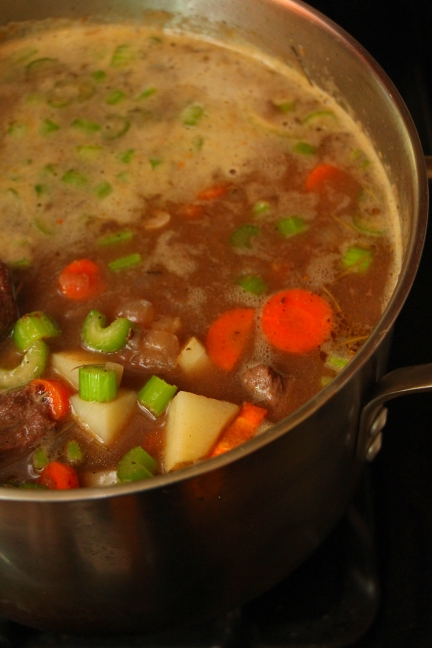
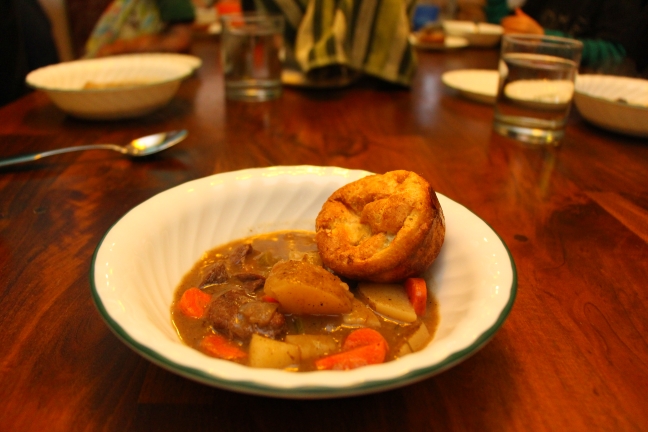
Beef stew. What could be better on a cold, December day? I’m talking a hearty beef stew, thick, with big chunks of meat and potatoes, the kind that fills you up, warms you up, and sticks to your ribs. I’m talking real beef stew, man. The kind of meal my Grandpa Halbach would have inexplicably served when we arrived at his house at 12 p.m., as if meat and potatoes were the food equivalent of saying, “hello”.

2014_11_21_0397

But wait, there’s more.

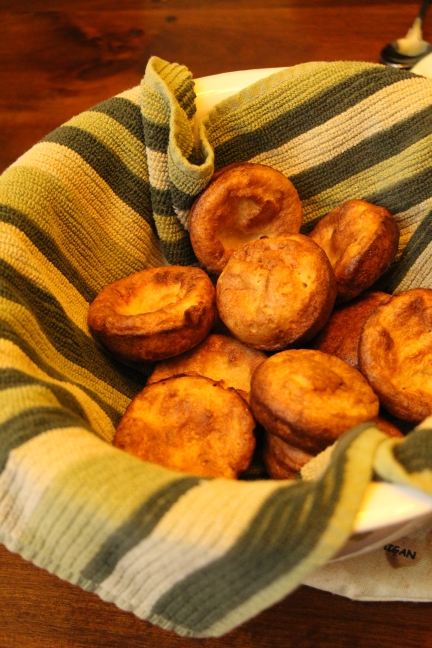
You need a little bread to go with a stew like that, and Yorkshire pudding is just the thing.

2014_11_21_0412This is an 18th century meal. This is the kind of meal civilization was built on. You eat a meal like this, and you’re ready to take on the world. You’ve got the energy to do whatever you need to do: overthrow a tyrannical monarchy, pen some important documents with a feather quill, invent electricity, wear buckles on your shoes, whatever you want.

Take a nap, maybe. You earned it.

Patriot.

The Journey:

When it comes to cutting onions, I cry faster than James Van Der Beek watching The Notebook.

The last time I made this, I made a double batch. That’s 4 onions. This from a guy who cries cutting green onions. Luckily, I came prepared.

2014_11_21_0387

(Onion Goggle Selfie)

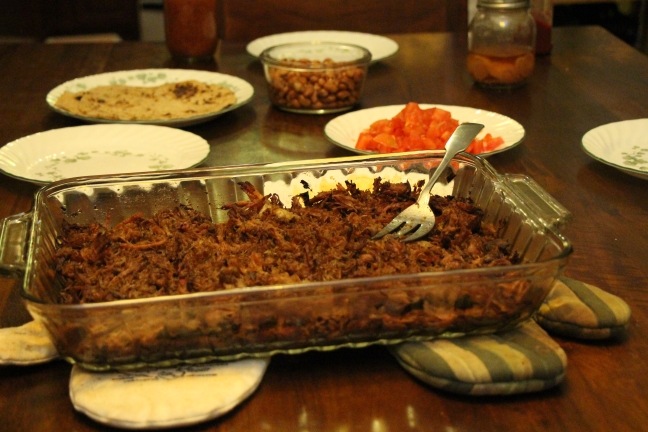
Unfortunately, onion goggles cannot prevent me from weeping big tears of joy at the site of this delicious plate of hearty meat:

2014_11_21_0392

Big Plate of Meat Selfie

Before Sara made it the first time, I couldn’t have told you what Yorkshire pudding was. An English dessert, right? Wrong.

However, I fully endorse any recipe that can be described as, “biscuits + meat drippings”. In fact, we use leftover bacon grease to cook ours, just in case you had any part of your heart that wasn’t already in failure from that meat picture up there.

The Verdict:

If I had one knock against this, it’s that perhaps I need to dial back the pepper a bit. It’s actually decently spicy, and it doesn’t really need to be. Other than that, though, delish.

2014_11_21_0415

The Recipe:

Hearty Beef Stew, from about.com:

  • 1 lb boneless chuck roast, cut into 2-inch pieces
  • 3 tbsp vegetable oil
  • 1 tsp salt
  • 1 tbsp freshly ground pepper (this makes a pretty peppery stew, you may want to adjust down)
  • 2 yellow onions, cut into 1-inch chunks
  • 1/4 cup flour
  • 3 cloves garlic, minced
  • 1 cup red wine
  • 3 cups beef broth
  • 1/2 tsp dried rosemary
  • 1 bay leaf
  • 1/2 tsp dried thyme
  • 4 carrots, peeled, cut into 1-inch slices
  • 2 stalks celery, cut into 1-inch slices
  • 3 large russet potatoes, peeled and cut in eighths
  1. On medium-high heat, add the vegetable oil to a large heavy pot (one that has a tight fitting lid).
  2. When it begins to smoke slightly, add the beef and brown very well. Do in batches if necessary. Add the salt and pepper as the beef browns.
  3. Once browned, remove the beef with a slotted spoon set aside.
  4. Add the onions and sauté for about 5 minutes, until softened.
  5. Reduce heat to medium-low, and add the flour and cook for 2 minutes stirring often.
  6. Add the garlic and cook for 1 minute.
  7. Add wine and deglaze the pan, scraping any brown bits stuck to the bottom of the pan. The flour will start to thicken the wine as it comes to a simmer.
  8. Simmer wine for 5 minutes, and then add the broth, bay leaves, thyme, rosemary, and the beef.
  9. Bring back to a gentle simmer, cover and cook on very low for about 1 hour.
  10. Add potatoes, carrots, and celery, and simmer covered for another 30 minutes or until the meat and vegetables are tender. Taste and adjust seasoning.
  11. Turn off heat and let sit for 15 minutes before serving.

Yorkshire Pudding, adapted very slightly from The Magic Onions:

  • 1 cup flour
  • 1 cup milk
  • 2 eggs
  • pinch of salt
  • a muffin tin
  • leftover bacon grease
  1. Pour the milk and eggs in a bowl and mix thoroughly.
  2. Put the flour and salt in another bowl. Make a volcano hole in the middle of the flour.
  3. Pour the milk and egg mixture into the center of the flour.
  4. Now for the trick… use a wooden spoon to gently swill the milk and egg mixture around in the middle of the flour volcano hole. Each ‘swill’ will grab a little of the flour from the side of the bowl and mix it into the mixture. Around and around and around until, slowly and gently, all the flour mixes in.
    **Note: Honestly, I don’t know why you have to do it this way, instead of just mixing it. I followed the directions, but I’m not sure it makes much of a difference.**
  5. Set your Yorkshire pudding mixture aside for at least an hour.
  6. Pre-heat oven to 450 degrees F. Put 2 teaspoons of bacon grease in the bottom of each pan in the muffin tin.
    **Note: Try not to put too much bacon grease in. It doesn’t take much, less than you think.**
  7. Put your muffin tin in the hot oven for 10 minutes or until the oil is very hot (almost smoking)
  8. Carefully (it’s VERY hot) take it out of the oven (and close the oven again to keep the heat in) and quickly pour or spoon the Yorkshire pudding mixture into the muffin tins, filling about two thirds full. Try to do this as fast as you can as you don’t want the oil to cool.
  9. Return muffin tin to the oven and bake for 20 minutes at the same high heat. You can NOT peek! Don’t open your oven until the 20 minutes is up.
  10. After 20 minutes, your Yorkshire puddings should be perfect.