Chana Masala

The first Friday of the month is reserved for recipes. You can see additional First Friday Food posts here.

The Reason:

Ollie’s class has been “eating the alphabet” this year. From his teacher:

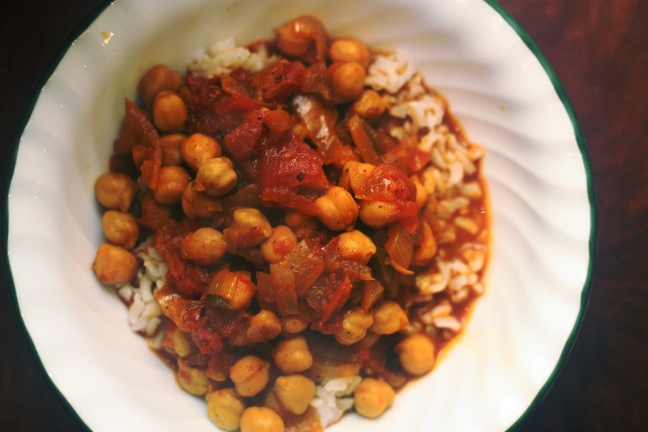
C was Chana Masala, an Indian chickpea curry dish. And the kids GOBBLED it up. They loved it. We insisted that everyone take at least one bite – and a good deal of the class ate and ate and ate.

Well, we’ve made this a couple of times now, and his enthusiasm hasn’t waned.

2016_03_03_0300

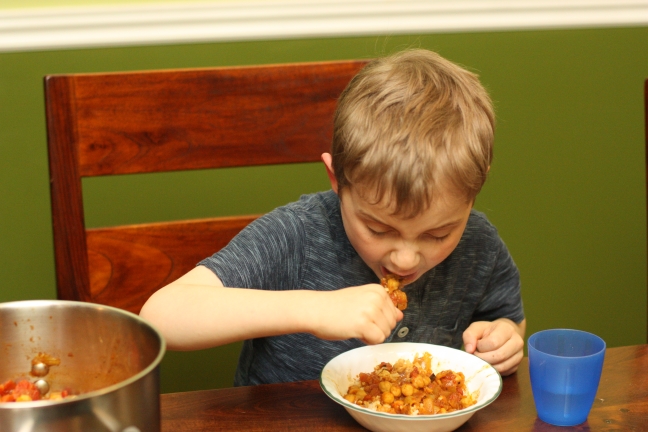
BUT I CAN’T WAIT FOR IT TO COOL IT’S TOO DELICIOUS

The Journey:

I love Indian food as much as the next guy, and I never seem to eat it often enough. By which I mean, no matter how often I eat it, it could always be more.

2016_03_03_0296

It is almost comedic how many spices are in this. Here is a picture of the aftermath, and believe me, this wasn’t all of it.

2016_03_03_0295

(My favorite part of this picture is the spray of red in the lower right corner there. Did the paprika get out of control in the madness of supper prep? Did the cayenne explode in an ecstasy of flavor? Did Ollie have to cut someone to get an extra helping? We don’t know.)

The Verdict:

::sigh::

This is a good recipe, but I just have not been able to master making Indian food like a native. I understand I didn’t exactly grow up making this kind of food, but…there’s something I’m missing. Maybe the chickpeas need to cook longer? I don’t know.

In the meantime, Ollie sure doesn’t seem to mind this as a suitable replacement.

2016_03_03_0297

The Recipe:

Recipe adapted from Smitten Kitchen.

  • 1 tablespoon vegetable oil
  • 2 medium onions, chopped
  • 1 clove garlic, diced
  • 2 teaspoons fresh ginger, diced
  • 1 fresh, hot green chili pepper, minced
  • 1 tablespoon ground coriander
  • 2 teaspoons ground cumin
  • 1/2 teaspoon ground cayenne pepper
  • 1 teaspoon ground turmeric
  • 2 teaspoons cumin seeds
  • 2 teaspoons paprika
  • 1 teaspoon garam masala
  • 1 can diced tomatoes
  • 2/3 cup water
  • 2 (15-ounce) cans chickpeas, drained and rinsed
  • 1/2 teaspoon salt
  • 1/2 lemon (juiced)
  1. Heat oil in a large skillet.
  2. Add onion, garlic, ginger and pepper and sauté over medium heat until browned (Note: make sure the onions are a little extra brown!)
  3. Turn heat down to medium-low and add the coriander, cumin, cayenne, turmeric, cumin seeds, paprika and garam masala.
  4. Cook onion mixture with spiced for a minute or two, then add the tomatoes and any accumulated juices, scraping up any bits that have stuck to the pan.
  5. Add the water and chickpeas.
  6. Simmer uncovered for 10 minutes, then stir in salt and lemon juice.

Apple Baked French Toast

The first Friday of the month is reserved for recipes. You can see additional First Friday Food posts here.

The Reason:

This is something of an old family recipe, and I am tired of always trying to find it online. Saving here for posterity.

My mom has always made apple baked french toast. It was always a kind of “special occasion” breakfast, but we particularly like to have it on Christmas morning. We prepare it the night before, and then when we get up, we start the oven preheating. We pop it in the oven, and it’s ready to go right about when we finish opening presents!

The Journey:

This is not actually my mom’s recipe; this is just a modified version of one that we found on the Internet. It must be pretty similar. Mom, care to comment?

One thing I would recommend is using bread that is a bit drier, like a baguette or something a little crustier, to soak up some of the egg-liquid.

2015_12_24_2578

All recipes say to peel the apples, but I’m way too lazy for that. I honestly don’t think you need to (apple peels get pretty soft when you cook them), but that’s up to you I guess.

2015_12_24_2581

However, we do have a bit of mitigating circumstances.

Usually when my mom makes it, she uses her “apple peeler-corer-slicer” to peel and cut the apples:

We don’t have one of those. However, as you may know, we have a family tradition of making applesauce every year. Lucky for me, Mom and Ron usually also can cut up apples and give them to us for Christmas, which means we have a supply of already-peeled-and-cut apples, which makes this pretty easy. One jar is not quite enough for a batch of apple baked french toast, so we cut up 3 or 4 apples in addition.

2015_12_24_2584

The Verdict:

Well, it should be pretty obvious at this point that I recommend this one. It’s great for when you have guests, by itself, with syrup, or with whipped cream on top.

2015_12_25_2608

The Recipe:

Recipe inspired by King Arthur Flour:

  • 1 baguette, about 18″ to 20″ long
  • 8 large eggs
  • 2 cups milk
  • 1/4 cup granulated sugar
  • 1 tablespoon vanilla
  • 1/4 teaspoon ground nutmeg
  • 2 dashes cloves
  • 1/4 teaspoon salt (skip if bread is salty)

Topping:

  • 1 jar of canned apples + 3 or 4 apples thinly sliced (~6 large apples if not using canned)
  • 1/4 cup brown sugar
  • 1 teaspoon ground cinnamon
  • pinch of salt
  • 2 tablespoons melted butter
  • Optional: 1/2 – 3/4 cup walnuts or pecans
  1. Lightly butter a 10″ x 15″ baking pan or similar-sized casserole dish.
  2. Slice a crusty loaf of bread into 1″ slices. Place the slices of bread into the pan.
  3. In a medium-sized bowl beat the eggs, then whisk in the milk, sugar, vanilla, nutmeg, cloves, and salt.
  4. Pour this mixture over the bread, and let it soak in while you’re preparing the topping.
  5. Peel and slice the apples thinly. Toss them with the remaining topping ingredients, and spread them over the bread in the pan.
  6. To bake immediately, preheat the oven to 375°F. To bake up to 48 hours later, cover the pan, and refrigerate.
  7. NOTE: we cover with tinfoil to avoid burning the top
  8. Bake the French toast in a preheated 375°F oven for 30 to 40 minutes, until the apples are soft and the eggs set. If it’s been refrigerated, remove the cover, and bake for 60 to 70 minutes.
  9. NOTE: We always, always do it cold. We put it in the oven while it is preheating, so the glass pan doesn’t break due to temperature shock, and set the timer for 80 minutes.

Seltzer Water Pancakes

The first Friday of the month is reserved for recipes. You can see additional First Friday Food posts here.

The Reason:

My brother mentioned making pancakes that used the fizziness of seltzer to help them rise, which I had never heard of. And, well, I like pancakes, so.

2015_05_17_1788

The Journey:

I don’t think you really need a mixer to make pancakes. It is debateable whether it’s worth it at all, since I need to dirty a spoon for dropping them on the pan anyway. On the other hand, this stand mixer just sits there on the counter taking up space and demanding to be used to justify its existence, so why not?

Plus, it’s purty in pictures.

2015_05_17_1789

The seltzer was indeed quite dramatic, with all the fizzing. I would imagine that kids would find this fun, or else just showing off in front of people. “And now, the secret ingredient!” you proclaim with a flourish, making a bubbly pancake volcano.

But mostly it’s just me in the kitchen, making volcanoes by myself, so much of the effect is wasted.

2015_05_17_1792

The Verdict:

I gotta be honest: they were okay, but nothing special. They’re very, very similar to the Oatmeal-Yogurt Pancakes. The seltzer water, though dramatic, didn’t really make that much of a difference over traditional methods as far as fluffiness of the pancakes. There was nothing wrong with them, but since we don’t keep seltzer water in the house I probably won’t make these again.

2015_05_17_1802

The Recipe:

Recipe from I Heart Eating:

  • 2 c. all-purpose flour
  • 2 T. granulated sugar
  • 1/2 tsp. salt
  • 1 c. plain yogurt
  • 2 tsp. baking soda
  • 1 1/3 c. sparkling seltzer water
  • 2 eggs, lightly beaten
  • Butter
  1. In a large bowl, sift together the flour, sugar, and salt.
  2. In a separate small bowl, stir together the yogurt and baking soda; let sit for 10 minutes.
  3. Add the yogurt mixture, seltzer, and eggs to the flour mixture; whisk until just combined.
  4. Let batter rest for 10 minutes.
  5. Meanwhile, heat butter in a skillet or on a griddle over medium heat.
  6. Scoop about 1/4 cup of batter onto skillet, gently spreading out each portion of batter.
  7. Cook pancakes until bubbles begin to form around edges, about 2 minutes.
  8. Flip each pancake with a spatula, and cook until golden brown, about 2 minutes more.
  9. Repeat with remaining batter, re-buttering skillet as needed.

Lasagna-Stuffed Spaghetti Squash

The first Friday of the month is reserved for recipes. You can see additional First Friday Food posts here.

The Reason:

I like spaghetti squash in principle. It *seems* like it is a good idea, however, I never seem to like the results. I’ve tried spaghetti squash recipes repeatedly, but it always came out kind of…cold and squash-y. This time, I’ve finally found a winner!

The Journey:

Spaghetti squash is kind of like magic. It looks like any regular squash…

IMG_6303

…but then it somehow separates into these individual tentacles strands of spaghetti. So, kind of unlike every other squash you’ve ever seen. Unlike every other VEGETABLE you’ve ever seen. I mean, it’s definitely not some kind of alien fruit or impregnation device, right? Heh, because that would be *crazy*, right? RIGHT?

IMG_6308

Make sure you squeeze as much water out of the squash as possible, so it’s not runny (also, it can’t hurt *just in case* they are actual alien tentacles). Throw some salt in there too; you never really can be too careful with potential slimy alien tentacles.

IMG_6311

The Verdict:

Maybe I just like lasagne. When I was a kid, lasagne was my “birthday meal”. So if I ABSOLUTELY HAVE TO INGEST ALIEN TENTACLES (and/or impregnation devices), then disguising them as lasagna is really the way to go.

IMG_6319

(This post was definitely written by Shane Halbach, being sound of mind and body, and not some alien overlord guest blogging and trying to make you eat our weird alien fruits and/or impregnation devices.)

The Recipe:

Recipe from The Kitchn:

  • 5 pounds spaghetti squash (2 medium-sized squash)
  • 1 teaspoon olive oil
  • 1 yellow onion, diced
  • 2 to 3 cloves garlic, minced
  • 1 pound ground beef
  • 1 1/2 teaspoons salt, divided
  • 1 (15-ounce) can crushed tomatoes
  • 2 cups ricotta, whole or 2%
  • 1/4 cup roughly chopped parsley
  • 1 cup shredded mozzarella
  • Chopped parsley or basil, to garnish
  1. Preheat the oven to 400°F. Cut the squashes in half and scoop out the seeds. Lay them cut-side down in a roasting pan or other baking dish, and add about an inch of water. Roast for 45 to 60 minutes, until soft when poked with a fork. Transfer to a cooling rack until cool enough to handle.
  2. While the squash is roasting, warm the olive oil in a high-sided skillet or saucepan over medium-high heat. Stir in the onions and cook until translucent, 5 to 8 minutes. Stir in the garlic and cook until fragrant, 30 seconds. Add the ground beef and 1 teaspoon of salt. Cook until well-browned, breaking up the beef into small crumbles, 5 to 8 minutes. Stir in the crushed tomatoes and bring to a simmer. Continue simmering the sauce until the squashes are ready, 5 to 20 minutes. Taste the sauce and add more salt if desired.
  3. Use a fork to shred the inside of the squash, leaving about a half-inch of squash left in the shell. Mix the shredded squash into the tomato sauce. In a separate bowl, mix together the ricotta cheese, the parsley and 1/2 teaspoon of salt.
  4. Layer one half of the tomato-squash mixture into a 9×13 pan and top with the ricotta. Top with the second half of the tomato-squash mixture.
  5. Bake for 25 minutes, then sprinkle with mozzarella. Bake another 15 to 20 minutes, until bubbly.
  6. Sprinkle parsley or basil over the tops and serve immediately. Leftovers will keep for 1 week in the fridge.

Cinnamon Plum Cake

The first Friday of the month is reserved for recipes. You can see additional First Friday Food posts here.

The Reason:

I don’t remember if we made this the first time because we had plums, or if we bought plums to make it. But I can definitely tell you the second time, we definitely bought plums to make it.

I had another recipe for this week, but I was hoping to get this one out before the plums were completely done for the season!

2015_09_19_2320

The Journey:

I’m kind of ambivalent towards plums. I’ve got nothing against them, but I don’t usually feel like sitting down and just eating a plum, you know? HOWEVER, it turns out that if you put them in a CAKE, that’s a whole different story.

2015_09_19_2325

So, this recipe calls for 1 tablespoon of cinnamon, which is sort of an unprecedented amount of cinnamon. You may think that’s a typo, and it is. Kind of. From Smitten Kitchen:

I received a note from Amanda Hesser over the weekend giving me a heads-up that the 1 tablespoon listed in the Essential New York Times Cookbook was actually a typo, and should have been 1 teaspoon. In fact, the very original version in the Times had 1 tablespoon too, but all of the future ones had only 1 teaspoon, suggesting that it had been a typo there too.

Having made the 1 tablespoon version (repeatedly), I can tell you that I wouldn’t have it any other way. It is a lot of cinnamon, and I wouldn’t have thought cinnamon + plums = magic, but in fact, cinnamon + plums = magic.

2015_09_19_2326The Verdict:

I feel like this is a fancy-pants dessert that you could impress with at a party, and yet it is so delicious and easy to make, so you won’t mind just making it for yourself at home.

It is also the only dessert I know where you can literally PUT IN YOUR THUMB AND PULL OUT A PLUM. That’s got to count for something.

 The Recipe:

Recipe from Smitten Kitchen:

  • 1 cup whole wheat flour
  • 1 teaspoon baking powder
  • Large pinch of salt
  • 1 cup granulated sugar plus 1 to 2 tablespoon (depending on sweetness of plums)
  • 1/2 cup unsalted butter, softened
  • 2 large eggs
  • 12 smallish plums (Italian purple if you can get them), halved and pitted
  • 2 teaspoons fresh lemon juice
  • 1 tablespoon ground cinnamon
  1. Heat oven to 350°F.
  2. Sift or whisk together flour, baking powder and salt in a medium bowl.
  3. In a larger bowl, cream butter and 1 cup sugar together with an electric mixer until fluffy and light in color. Add the eggs, one at a time and scraping down the bowl, then the dry ingredients, mixing until just combined.
  4. Spoon batter into a greased, 9-inch springform pan and smooth the top. Arrange the plums, skin side up, all over the batter, covering it. Sprinkle the top with lemon juice, then cinnamon, then remaining sugar.
  5. Bake until cake is golden and a toothpick inserted into a center part of the cake comes out free of batter (but of course not plum juice), about 45 to 50 minutes. Cool on rack.
  6. Leave it covered at room temperature overnight.